{DIY} Africa To Your Heart – Craft
Our family is on that long roller coaster ride that I’m sure many of you have been on. You know I’m not talking Disney World! It’s called ADOPTION. Currently we are buckled in and coasting on that part of the roller coaster that is not so bad. We are in the process of adopting a 4-5 year old boy from Ethiopia. We have been waiting almost 6 months now on the Gladney waiting list. My husband and I have two daughters, ages 13 and 9 and are so excited to be adding to our family through international adoption. The average wait time for the age and gender we are requesting is 9 months so hopefully this roller coaster ride will make a turn soon and we’ll all start shouting “Wheeee” when we get to the next stage!
I am a stay-at-home mom that loves being creative. You may know me from my Africa ornaments. I have an Etsy shop called From Africa to Your Heart http://www.etsy.com/shop/EthiopiaAdoption where I sell all things Africa related. It’s been a busy fall making ornaments! You may have even visited our blog before: http://jenkinsethiopiaadoption.blogspot.com/
I thought I would share a fun project with you that is inexpensive and fairly easy…a Journal. The ladies in our Sunday School class had a gathering a few years ago and we all made these. The one I’m going to create below is an adoption journal. Think of what a great gift this would make for someone. Save all the photos that people send you this year in their Christmas cards and if you’d like to give them a gift at some point in the year, pull out that photo because you can use it in this craft!
Supply List
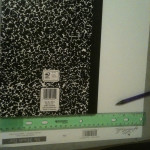
- Composition Notebook (you’ll see an example in the photos below)
- 2-3 Pieces of coordinating Scrapbook Paper
- Rubber Cement
- Ribbon
- Photograph
- Embellishments of Choice
- Scissors
- Glue Dots
- Mod Podge (Optional)
Instructions
 1. Lay out your first piece of scrapbook paper and with a ruler, cut out a portion that fits size of the notebook.
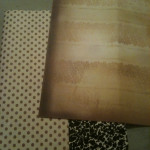
2. After you cut off the bottom portion of the paper so the paper now fits the size of the notebook, you’ll glue it starting on the back as seen in the next photo. I highly suggest rubber cement as it won’t curl your paper. The paper should wrap around onto half of the front of the notebook.
 3. Now cut another piece of coordinating scrapbook paper in the same way you cut the first piece. This one will be glued to the front and wrapped around onto the inside of the cover.
4. Your notebook should now look like this. For extra durability, you can optionally add a thin coat of Mod Podge to the front and back.
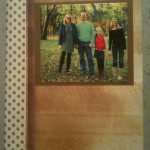
5. Now, take a photo and glue it onto the front. You can embellish the front any way you’d like.
 6. If you’d like to add a ribbon, use glue dots to attach the ribbon around the front and back of the notebook and the finished product will look something like this:
You can cover the inside front and back cover completely as well. Really, the way you design this is up to you. I have made these in the past as gifts and you can use themed paper for the person you’re giving it to. Here’s a few ideas.
1. Use scrapbook paper featuring music notes and make a notebook for your child’s music teacher.
2. Use teaching themed scrapbook paper and make a notebook for your child’s teacher.
3. Use sports themed scrapbook paper and make a notebook for your child’s coach.
As you can see, the possibilities are endless. If you have any questions about the instructions, feel free to email me at ethiopiaadoptionjourney@gmail.com and I will be glad to help!
Debi Jenkins


I LOVE your craft.. even though I'm not a crafty person, I really enjoying learning things to do with my girls. Thank you for taking the time and sharing this wonderful, fun notebook with my readers.
Bless you!!